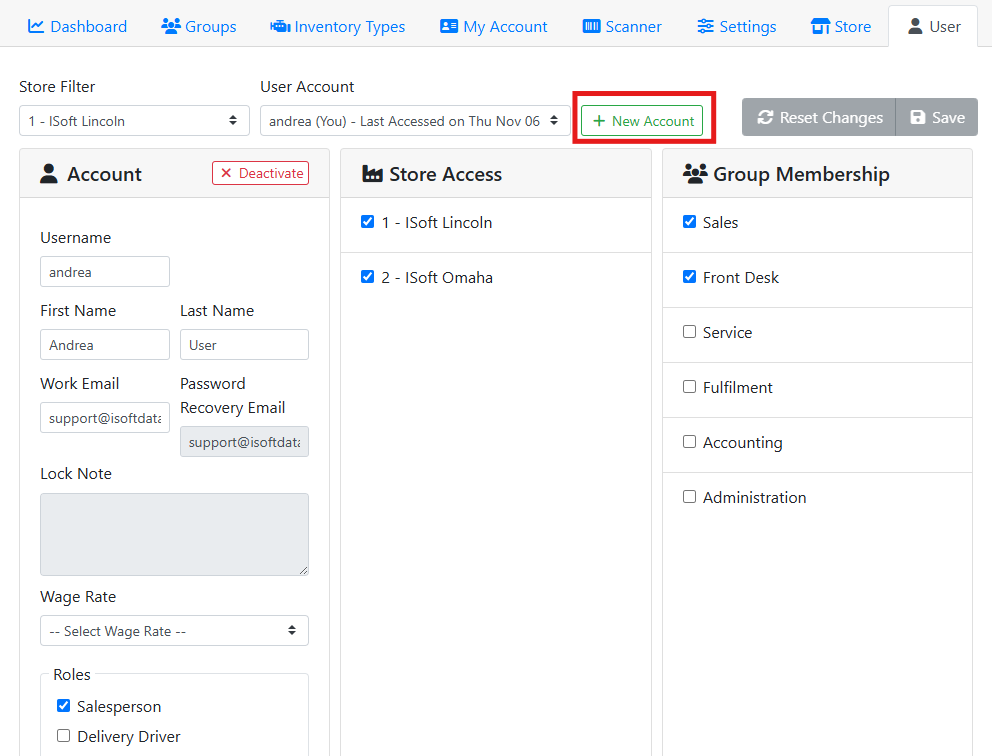
Manage the users who log in to ITrack from the Users configuration screen. Here you can create users, manage their permissions, roles, store access, and login credentials. Navigate to Configuration, and select the User tab.
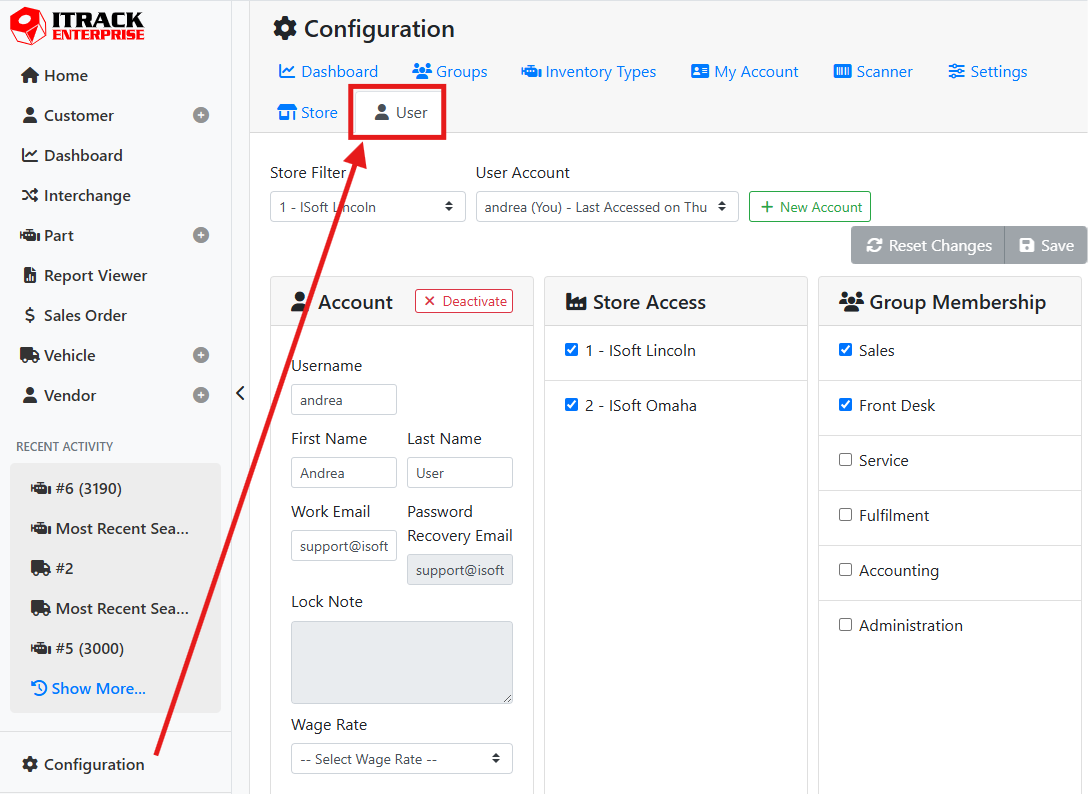
By default, your user is selected when you first navigate to the User screen. The Store Filter and User Account controls let you select different users.
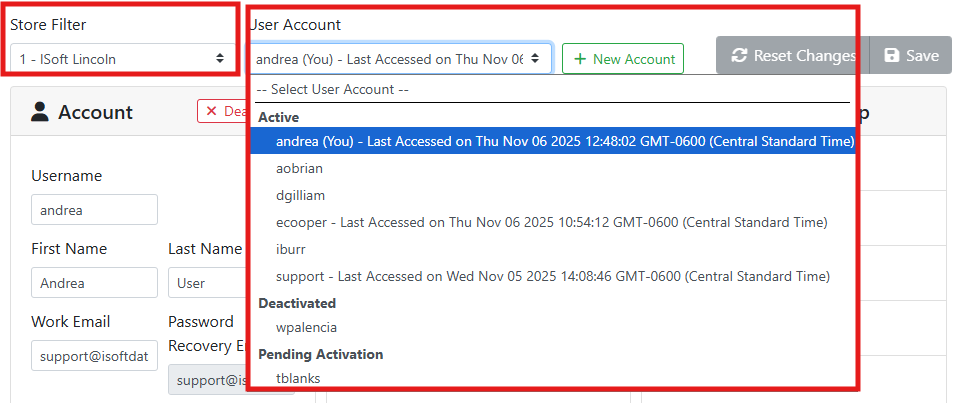
🏢 Store Filter and Store Access
The User Account menu only shows you users at the store you have selected in the Store Filter, if you don’t see the user you are looking for, make sure you have the correct store selected.
Users can be granted access to more than one store, for example if they are an administrator, or someone who travels and works at more than one location.
To change what store(s) a user can access, use the Store Access box and select the appropriate store(s). The stores a user can access affect what they can log in to, and permissions may affect what they are capable of doing for each store.
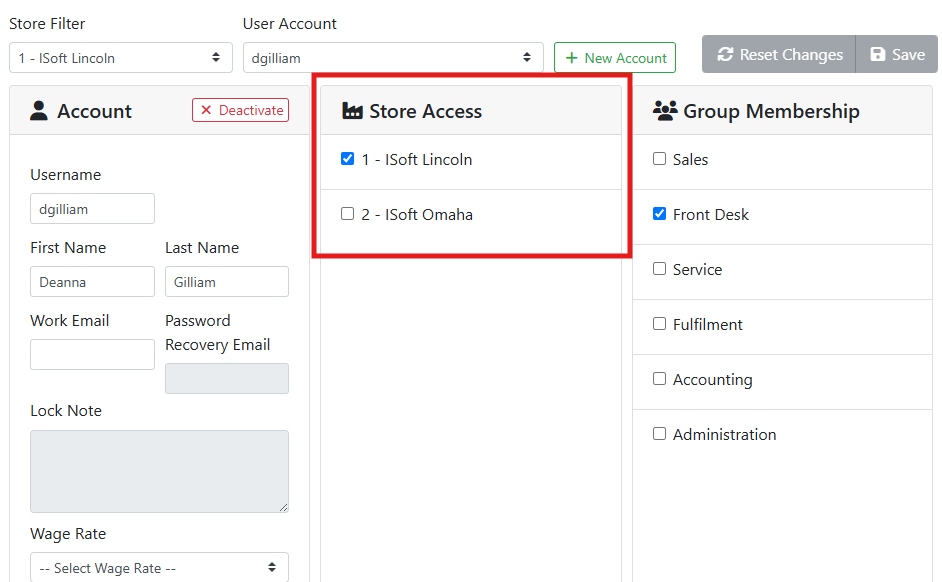
Read more about how Stores are used.
👤 Account Settings
The Account box controls the login credentials and main settings for the user.
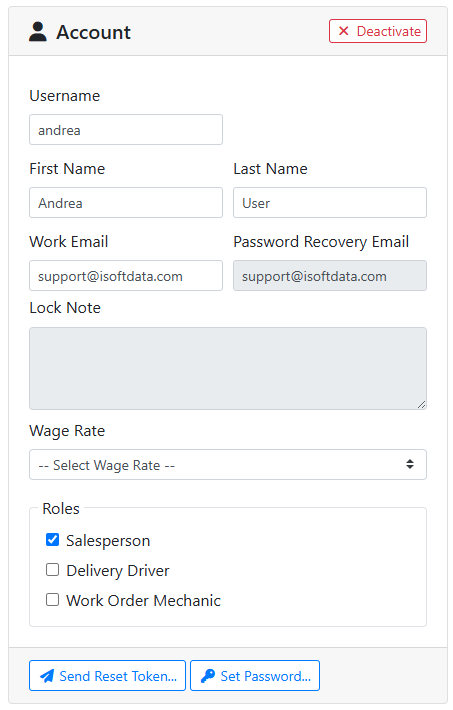
Username - The username is used to log in to ITrack and is used to represent the user in most tables and fields in ITrack.
First Name - The user’s first name.
Last Name - The user’s last name.
Work Email - The email address assigned to this user for work.
Password Recovery Email - The email address assigned to this user for password recovery. This should be a unique email address for this user that they can always access. The user can define their own password recovery email on the My Account tab of ITrack when they log in. If they forgot their password, they can initiate a password recovery process at the login screen, or a reset email can be sent to them by clicking the Send Reset Token button.
Password recovery is still in development in the web interface. Please use the desktop application for all password reset options at this time.
Lock Note - If a user is deactivated, the Lock Note is shown to them if they attempt to log in.
Wage Rate - Used to calculate labor costs on work orders.
Roles - Roles define what users can be picked in some menus, based on what type of work they do. Roles do not grant the user permissions to perform actions, however. To manage what a user is permitted to do in ITrack, use Permissions.
Read more about permissions
Salesperson - The Salesperson role allows this user to be set as a Counterperson or Salesperson on customers, customer correspondences, sales orders, core management, and work orders.
Delivery Driver - The Delivery Driver role is informational.
Work Order Mechanic - The Work Order Mechanic role allows this user to be set as the user who performed work on work orders, work order tasks, work order labor, and as a dismantler on vehicles.
Send Reset Token - Click this button to send a password recovery email to the user’s password recovery email address. The email will include a temporary code and allow the user to define a new password.
Password recovery is still in development in the web interface. Please use the desktop application for all password reset options at this time.
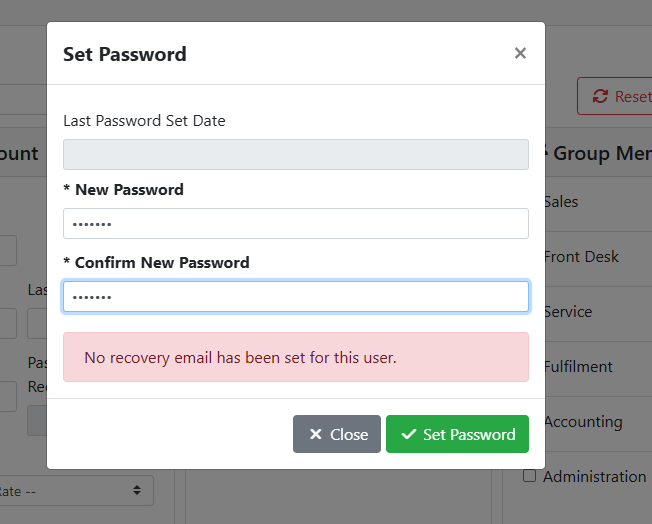
Set Password - Use this to set a password for the user. If the user already has a password, it will be replaced.
➕ Creating a User
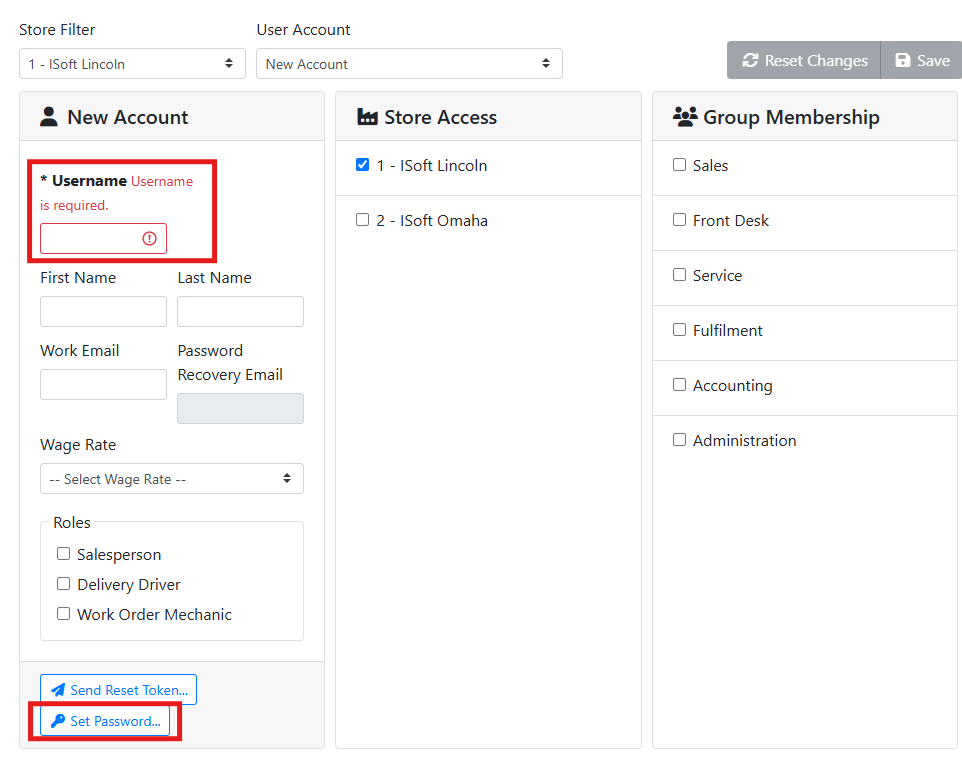
To create a new user, click the New Account button next to the User Account menu.
The Username field will be highlighted in red since it is a required field. You will also need to set a password for the user before you can save. Click Set Password near the bottom of the account box.
Enter a password for the user.
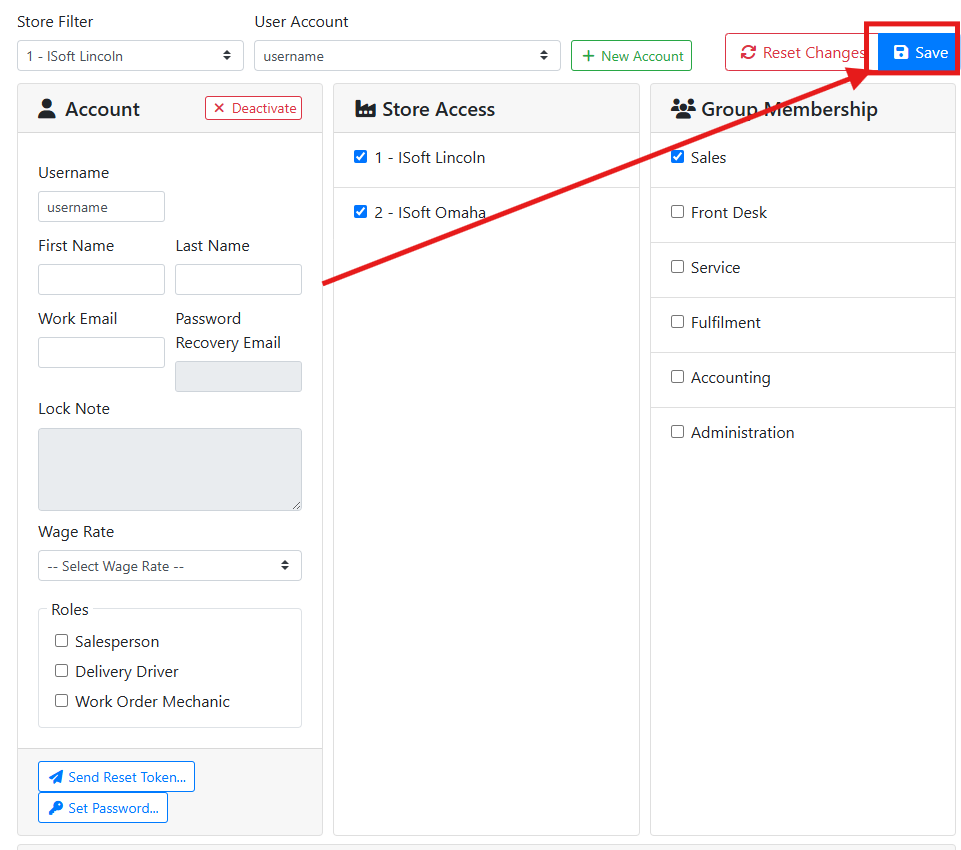
Make sure to click the Save button when you are finished. It is a good idea when creating a new user to make sure to set their store access and permissions right away.
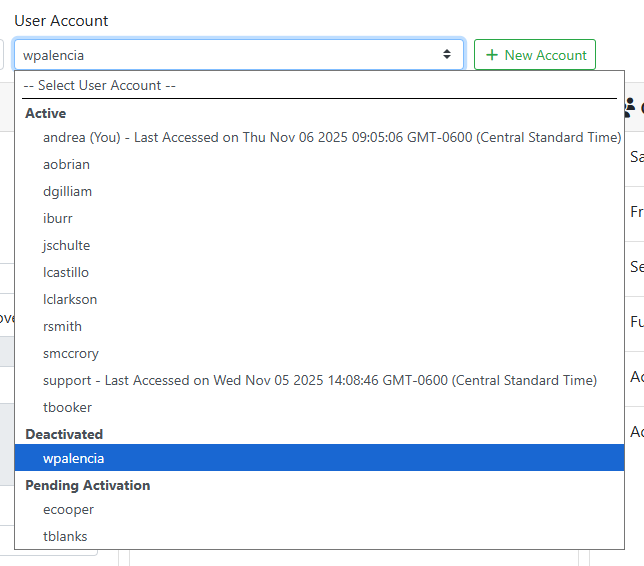
⏳ Pending Activation
Users may appear in the user list with a Pending Activation status. This is a temporary status used by the Desktop application where a user can assign their own password when they first log in.
This feature is only supported in ITrack Desktop at this time. You cannot activate pending users from the web login screen. Once the user is activated in the desktop application they will be able to log in.
➖ Deactivating a User
If a user should no longer have access to ITrack, you can deactivate their login credentials. To deactivate a user, select them in the User Account menu, and click the Deactivate button in the Account box.
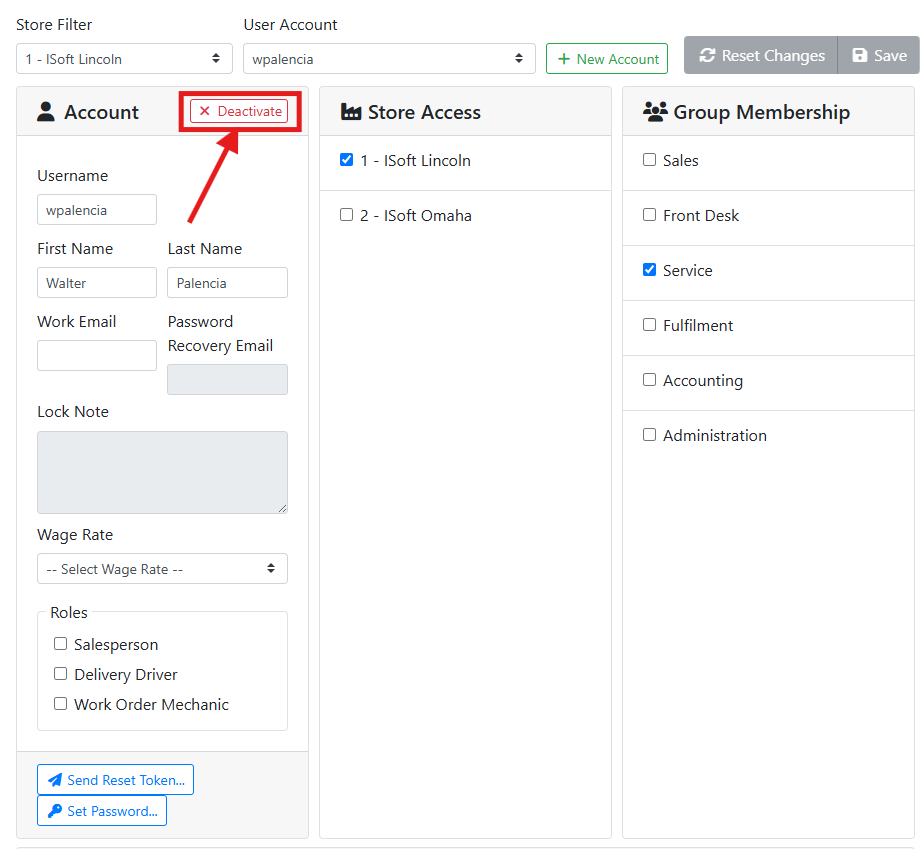
When deactivating a user, ITrack will ask you to provide a Lock Note. Use this to make a note of why the user is being locked, the user will see this reason when they try to log in.

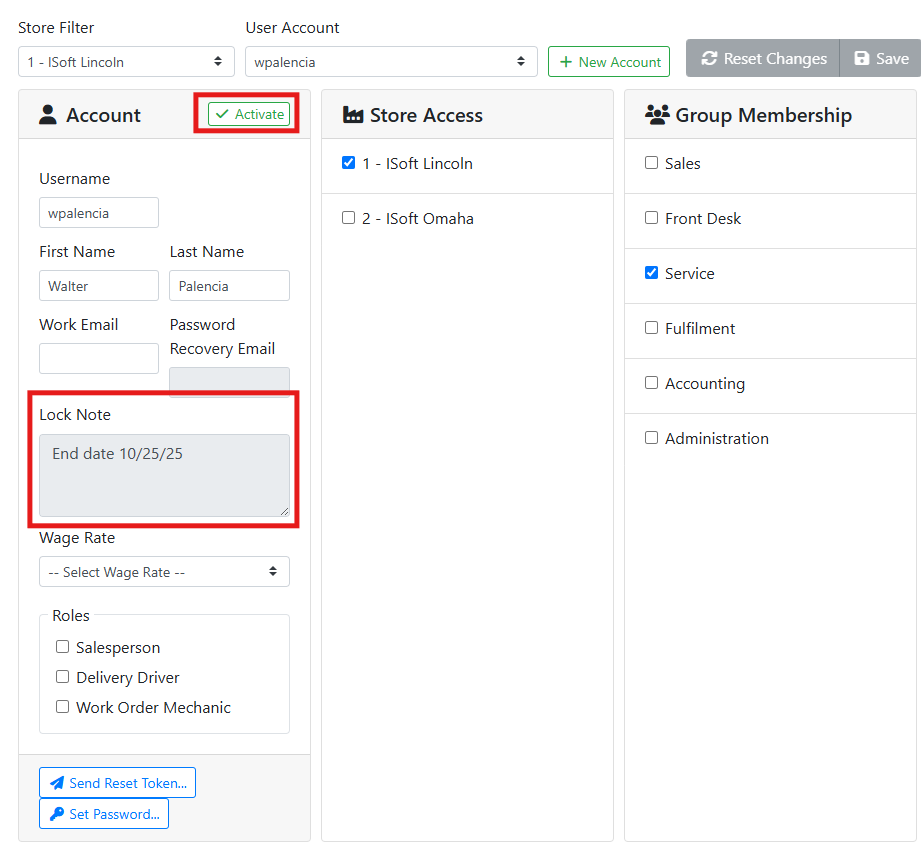
When the user is deactivated you will see the Lock Note in the Account box, and the Deactivate button will change to an Activate button. You can reactivate the user, for example if they are seasonal or contract-based, by clicking the Activate button.
Deactivated users will be grouped separately from other users in the User Account selection menu.
☑️ Group Membership and Permissions
Permissions can be granted to a user by assigning them to a group, or by setting their permissions directly on the User screen.