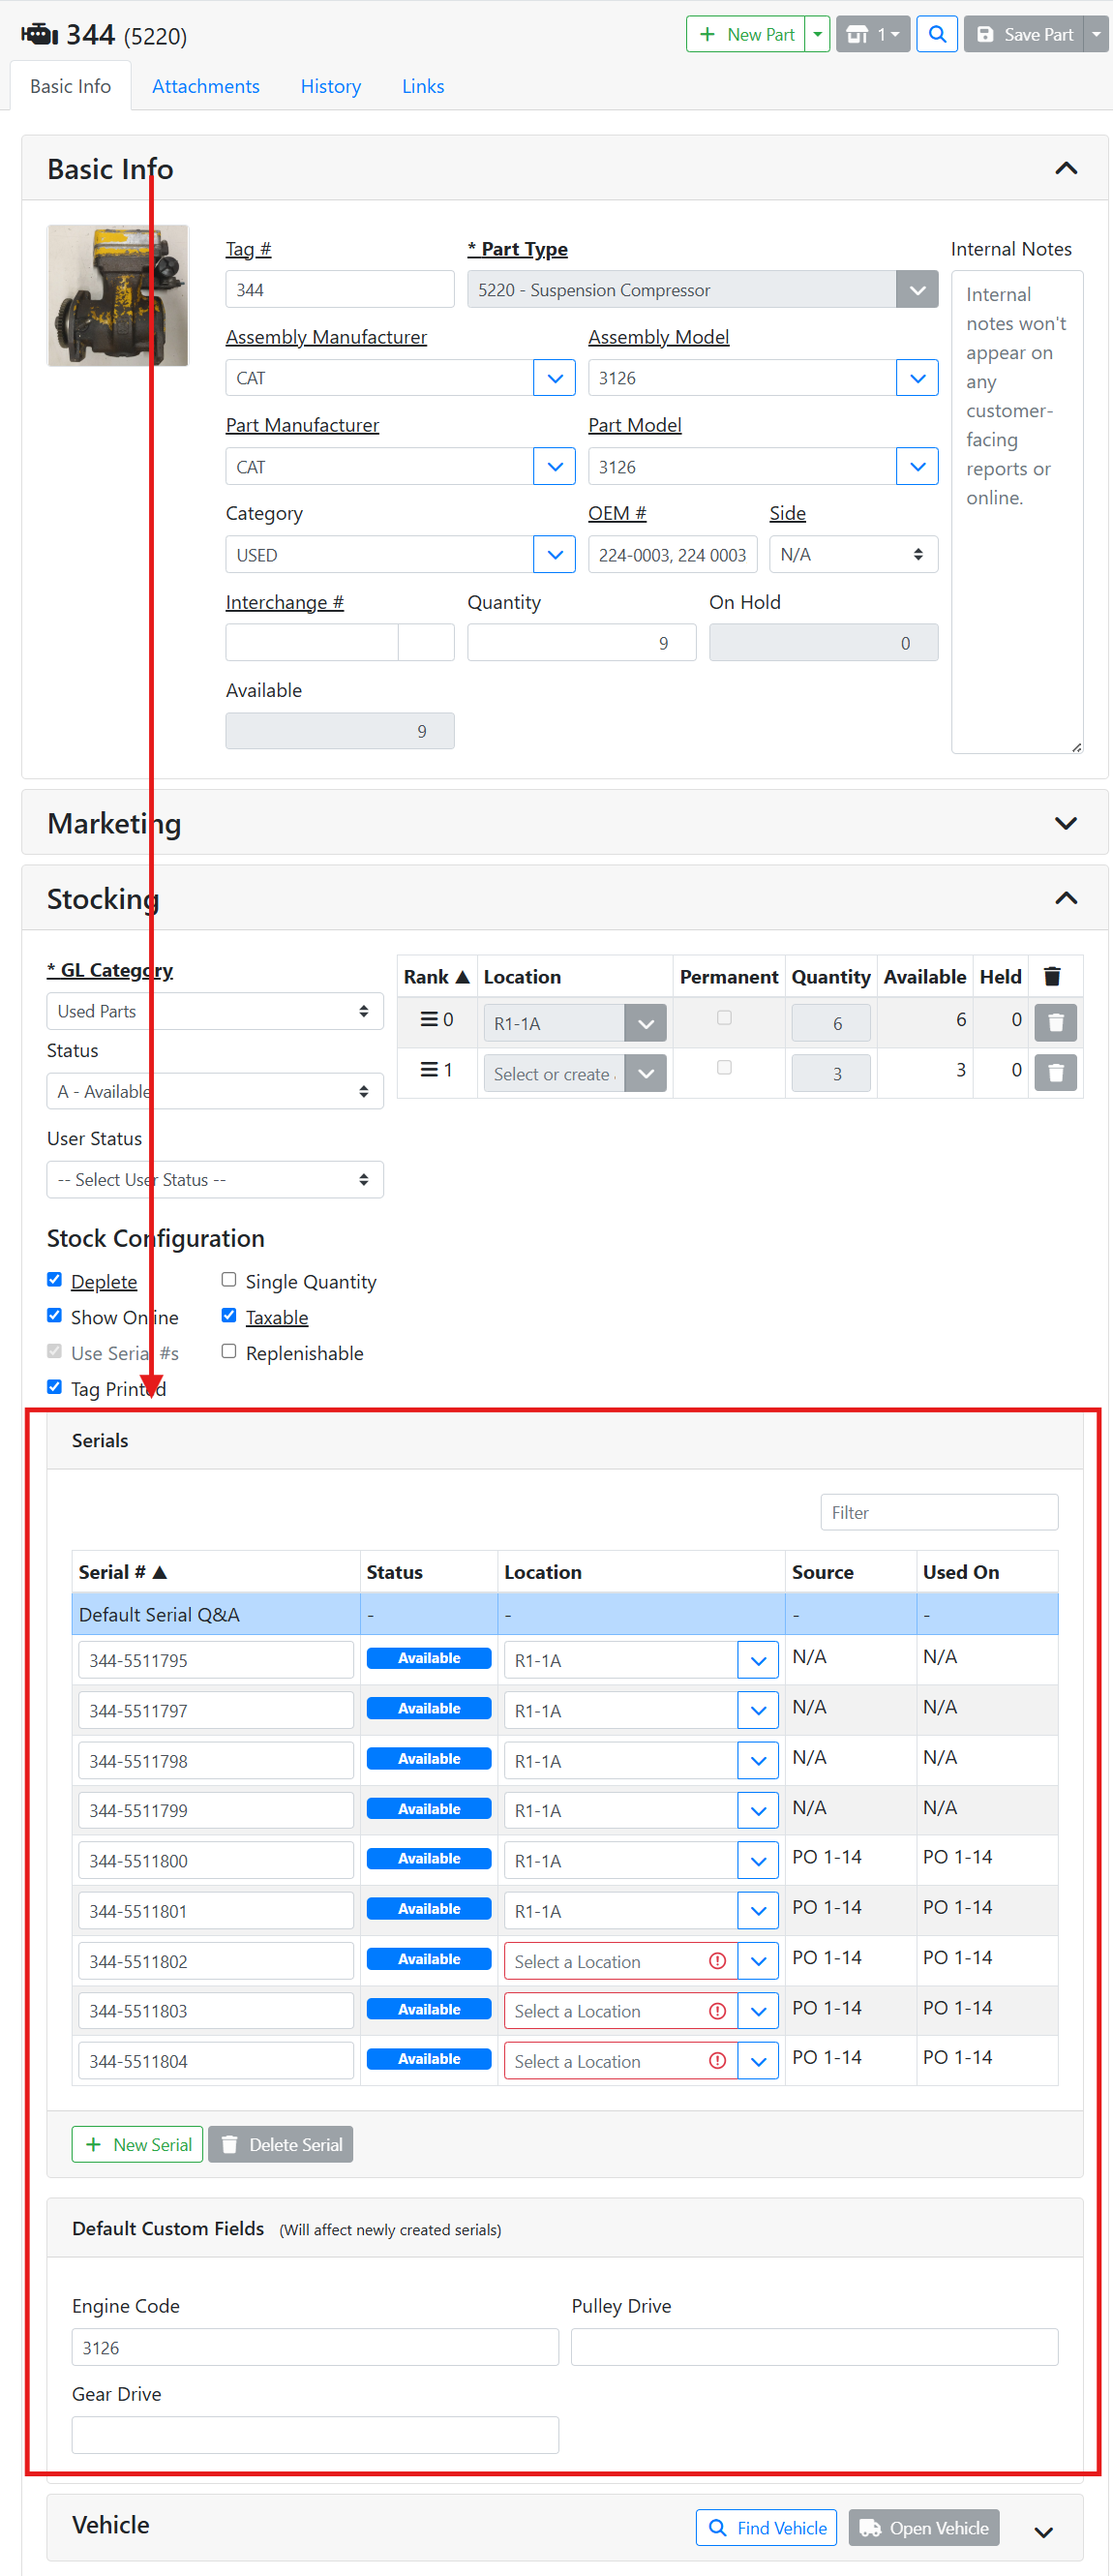
You can serialize parts when you want each individual item to have a unique serial number, even when they share the same SKU. Serializing parts also lets you enter custom field data specific to each individual serialized part. To see serial information for a part, on the Basic Info tab, scroll down to the Serial section in the Stocking box.
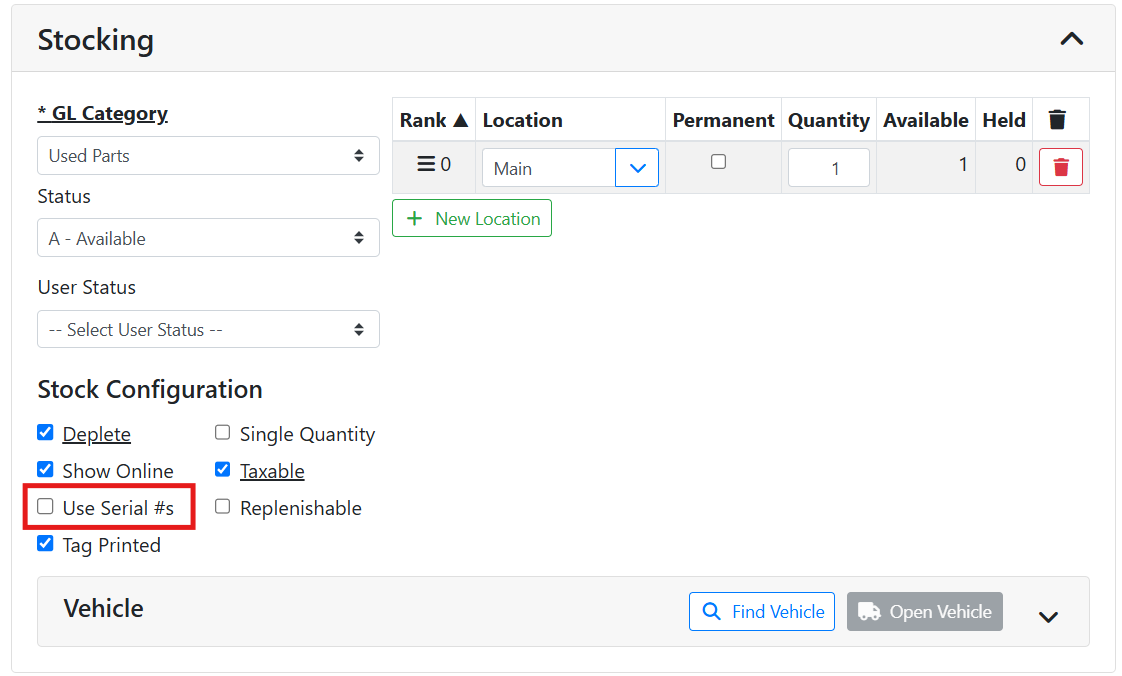
To turn a part into a serialized part, in the Stock Configuration section of the Stocking box, check Uses Serial #s.
Once you start assigning serial numbers to individual items, you can’t undo this setting.
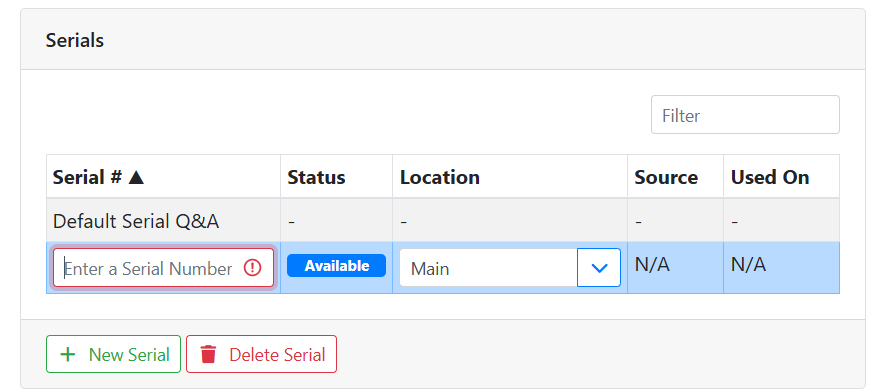
When you first check this box, you can start assigning serial numbers to your existing inventory. Enter a serial number for each individual part you have, and enter its location. You can also enter a serial number even if you only have one part.
Make sure the number of serial numbers you enter matches the amount of items indicated in the Quantity field. Otherwise you will have issues matching up serial numbers when selling parts.
Each serial number tracks its location individually. Read more about Inventory Locations.
When purchasing additional quantity for this part on a Purchase Order, you will be prompted to assign serial numbers when receiving.
Purchase Orders can only be used in ITrack Enterprise Desktop at this time.
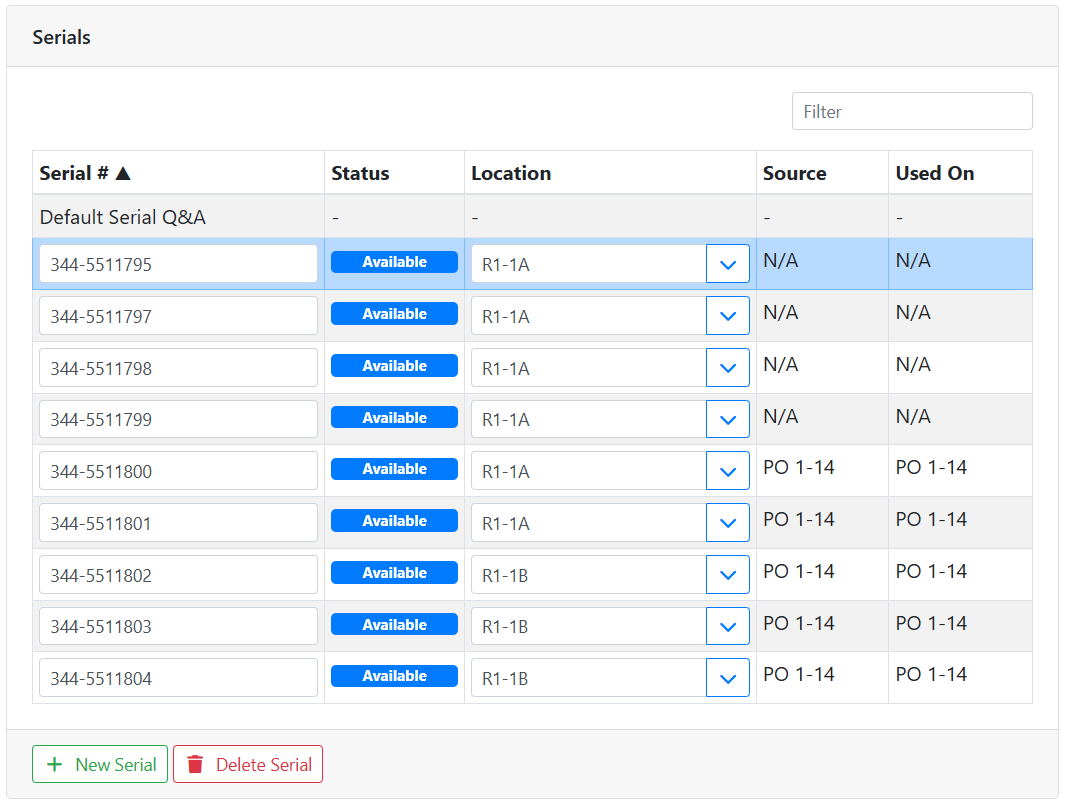
The Source column shows you what document the serial number was created on. The Used On column shows you the most recent document the serial number was used.
In this example, I serialized a part with 3 quantity. I received 5 more quantity on a Purchase Order, PO # 1-14. I received 2 of them into location R1-1A, and 3 of them into location R1-1B.
⚙️ Serialized Custom Fields
If you are using custom fields for the part type you have serialized, you can specify the custom field data for each serialized part as well. If you don’t see any custom field data for a selected serial number, that means it’s not configured for that part type.
Read more about Custom Fields.
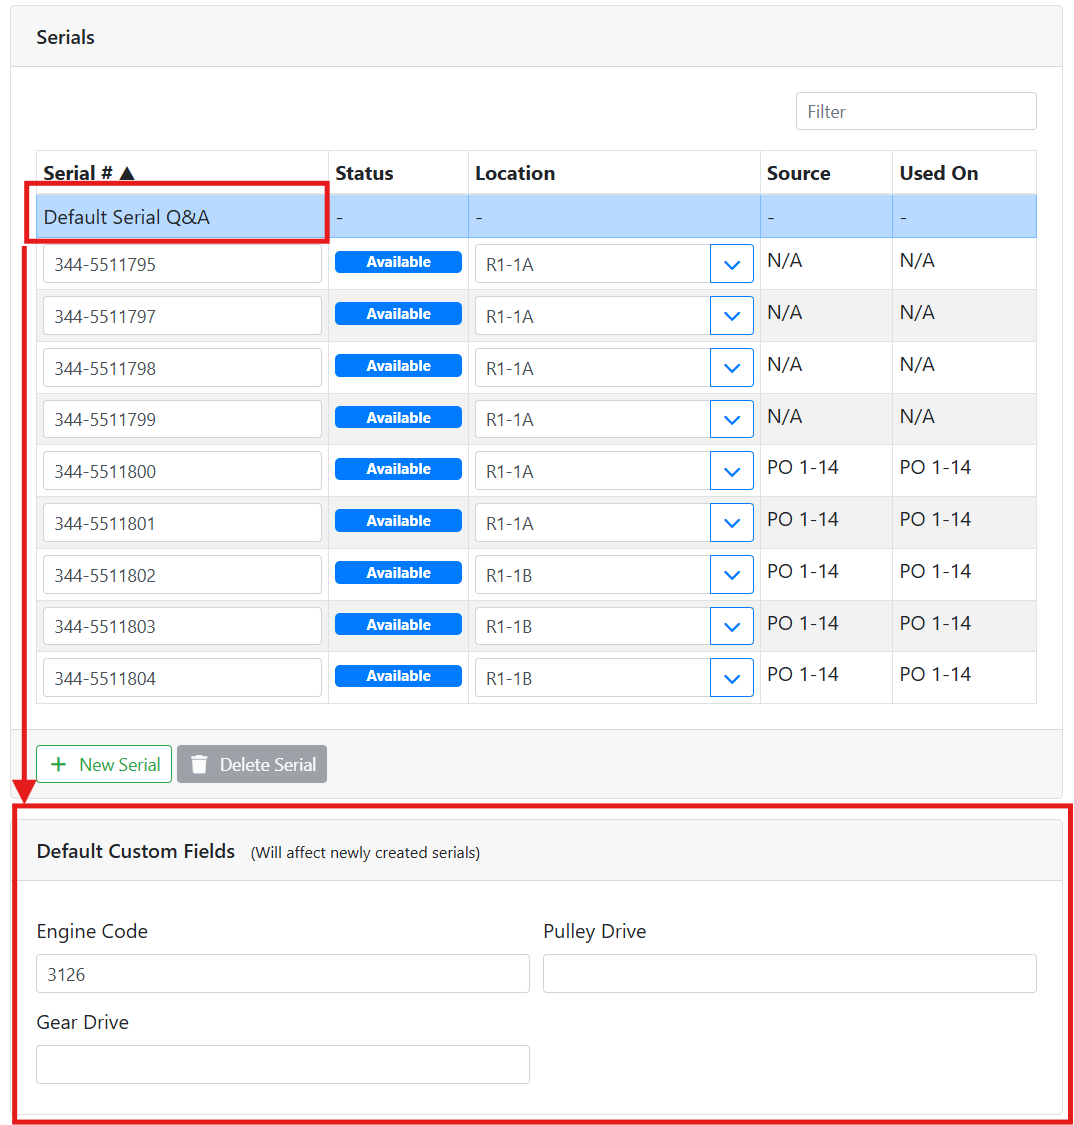
To specify custom data for each serial number, select the serial number row in the table above the custom fields box. You will see the serial number in the title of the custom fields box so that you can easily make sure you are on the right serial number.
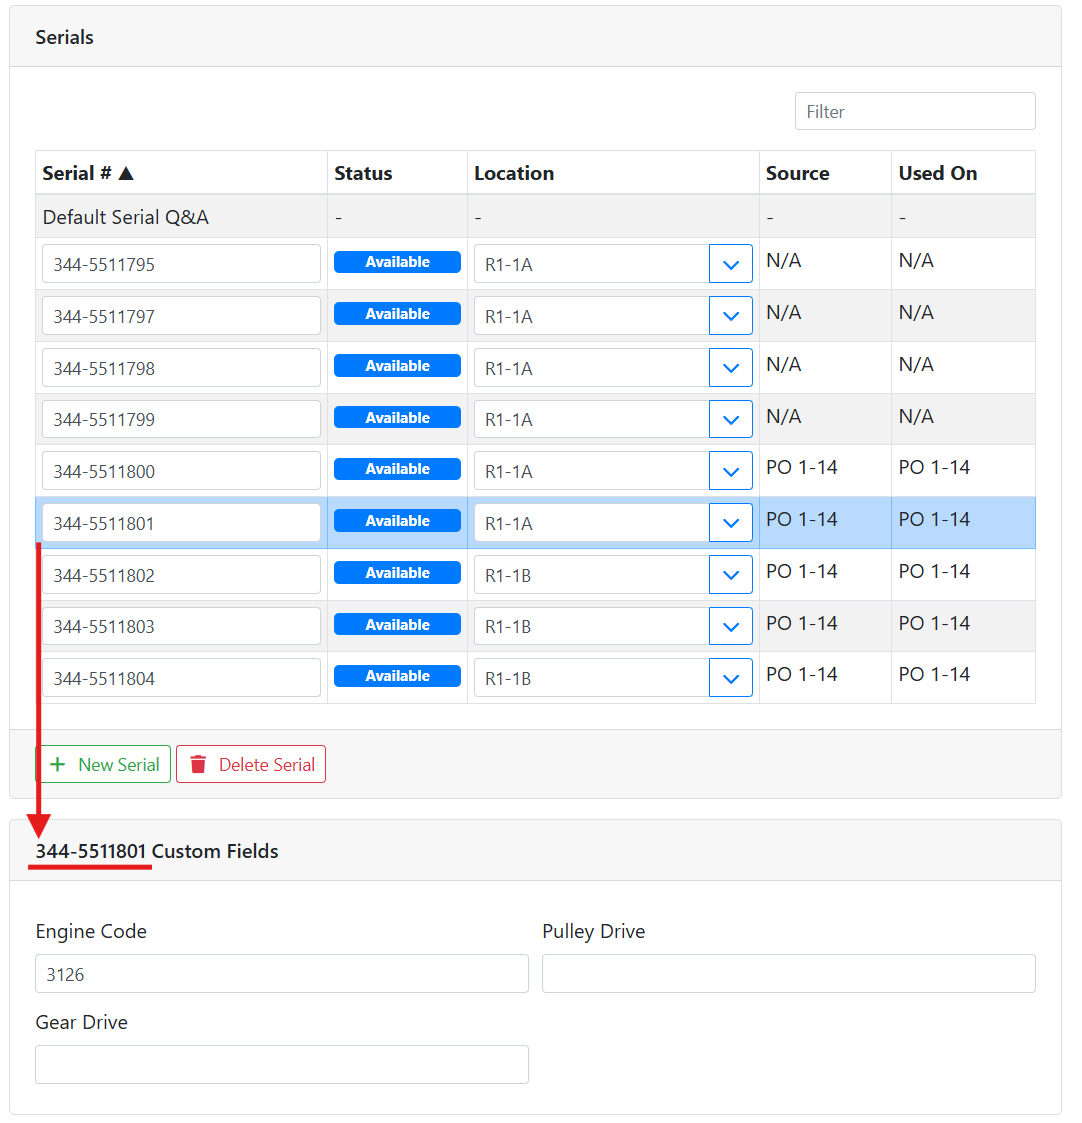
If all serialized parts should have the same data in the custom fields, you can enter this on the Default Serial Q&A line. Select Default Serial Q&A and enter your custom field data, then newly created serial numbers will start with that data. This only affects newly created serial numbers. If you already created serials that you want to have the same data, you will need to enter that data per serial number.