In addition to the standard fields for part, you might also set up custom fields that are specific to your company. They might be global and apply to all inventory, they might be specific to that inventory type, or they might be specific to that manufacturer, model, or category. You can also make them required. Custom fields may also be referred to as Q&A or Questions and Answers.
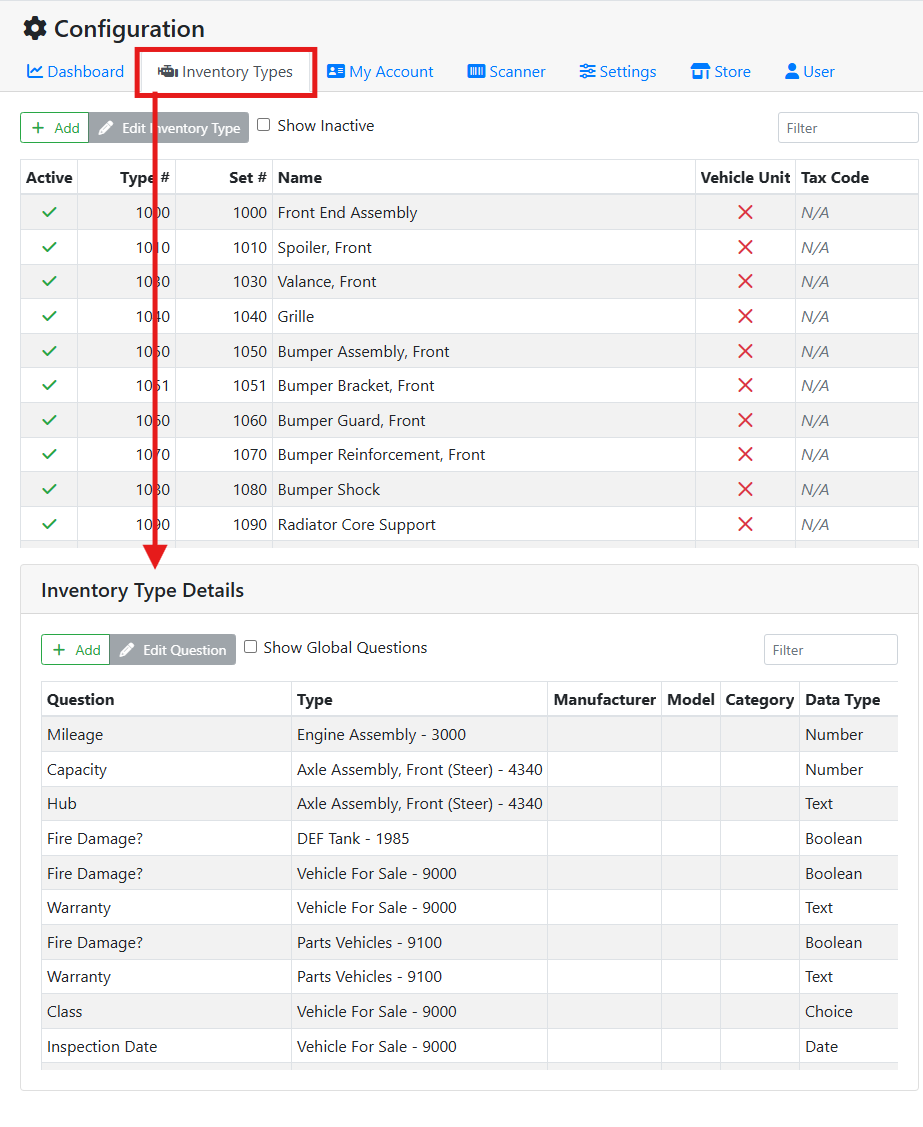
To manage custom fields, select the Inventory Type tab on the Configuration screen, and scroll down to the Inventory Type Details box.
Custom fields can apply to all inventory, only certain Inventory Types, or only certain Inventory Types with a specific Manufacturer, Model, or Category or any combination.
🌎 Global Custom Fields
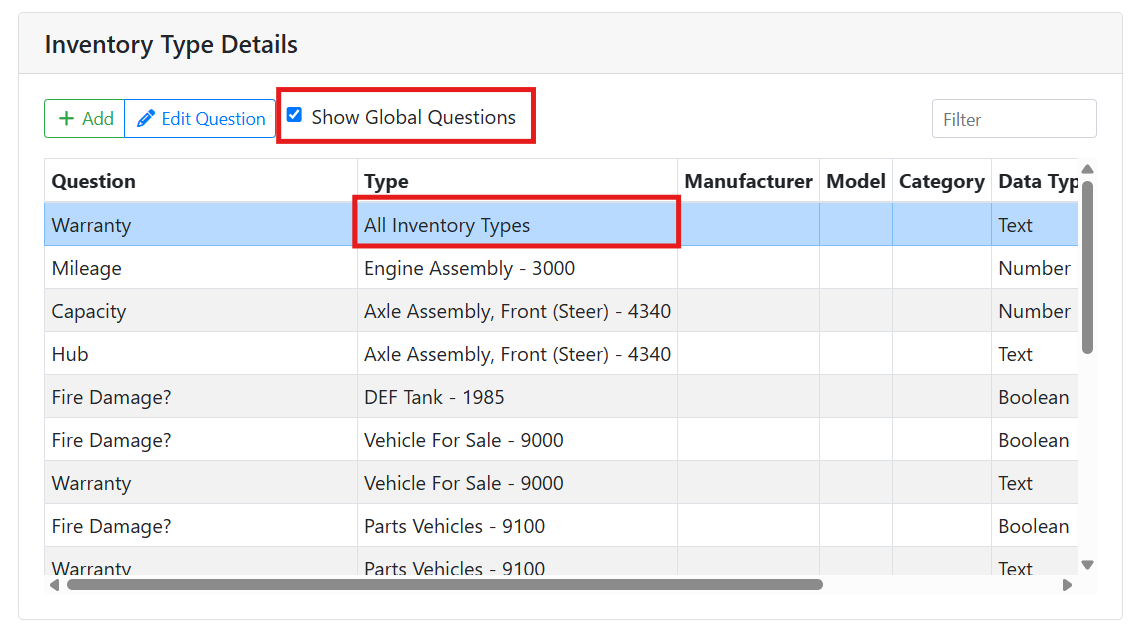
Global custom fields are available for all of your inventory. Check the Show Global Questions checkbox to show them in the list. Global custom fields appear in the list with All Inventory Types listed as the part type.
To make a global field, set the Inventory Type field to All Inventory Types when making a new field.
🎨 Type-Specific Custom Fields
Custom fields might apply to only specific Inventory Types. When an inventory type is selected in the table at the top of the screen, the list of fields below will be filtered to only show fields that apply to that part type. Configuring custom fields this way can be very helpful to handle data that only applies to some parts and not others.
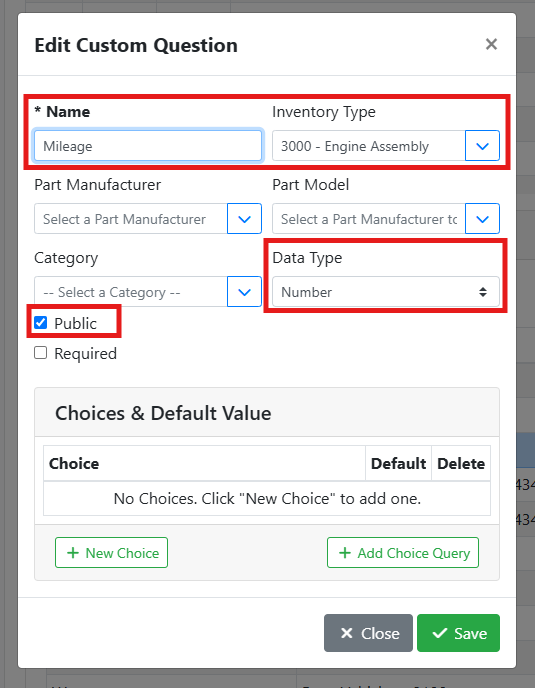
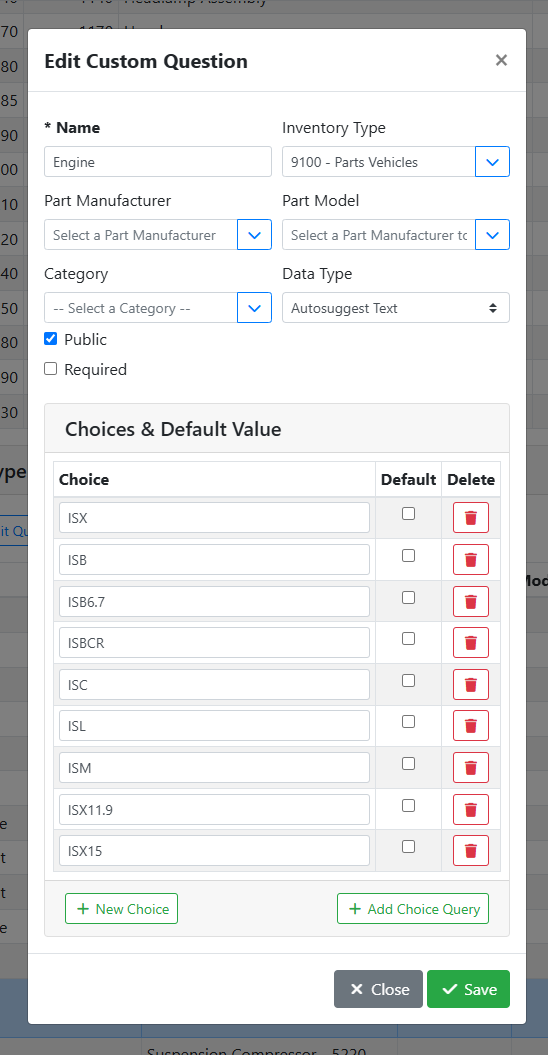
For example, you may want to indicate the mileage on an engine assembly. When adding a custom field, I set the name to Mileage, the inventory type to Engine Assembly, the data type to Number, and mark it Public since I want my customers to be able to see the mileage. Since I want to capture the mileage on every engine assembly, I leave the manufacturer, model, and category fields empty.
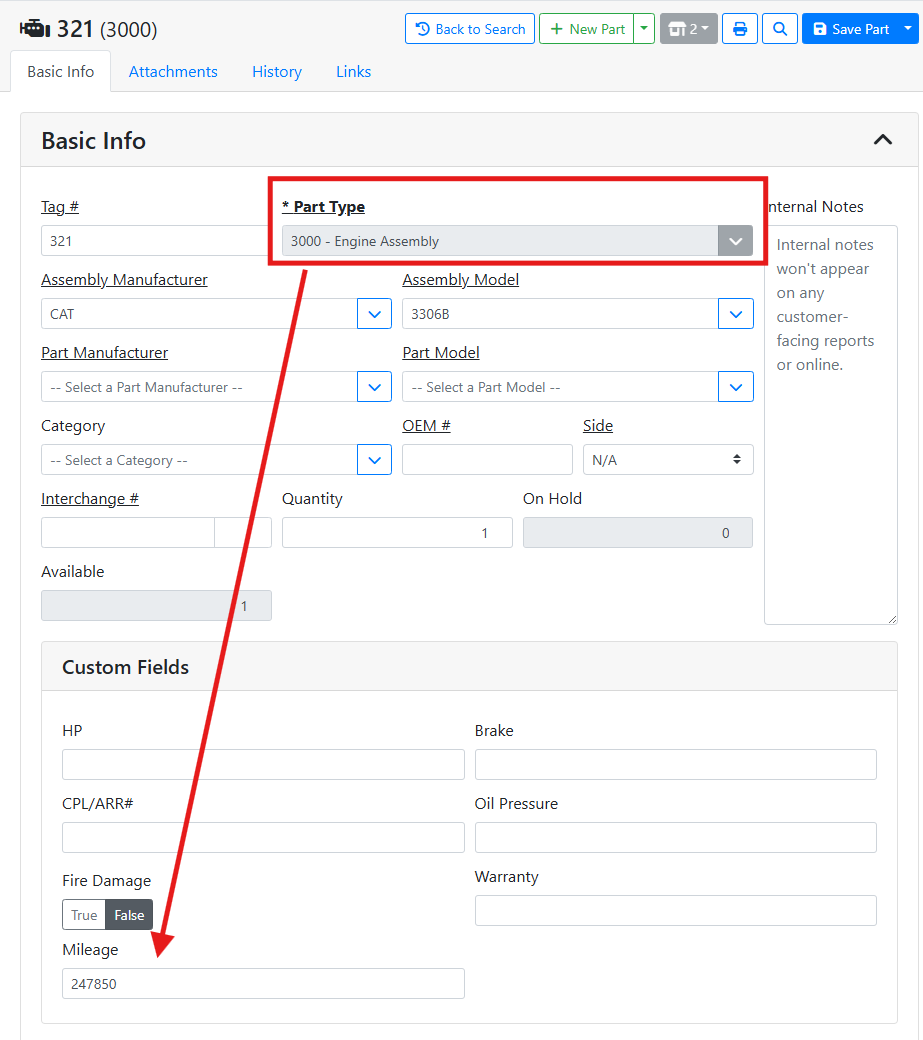
When I view an engine assembly, I can view and complete the mileage field.
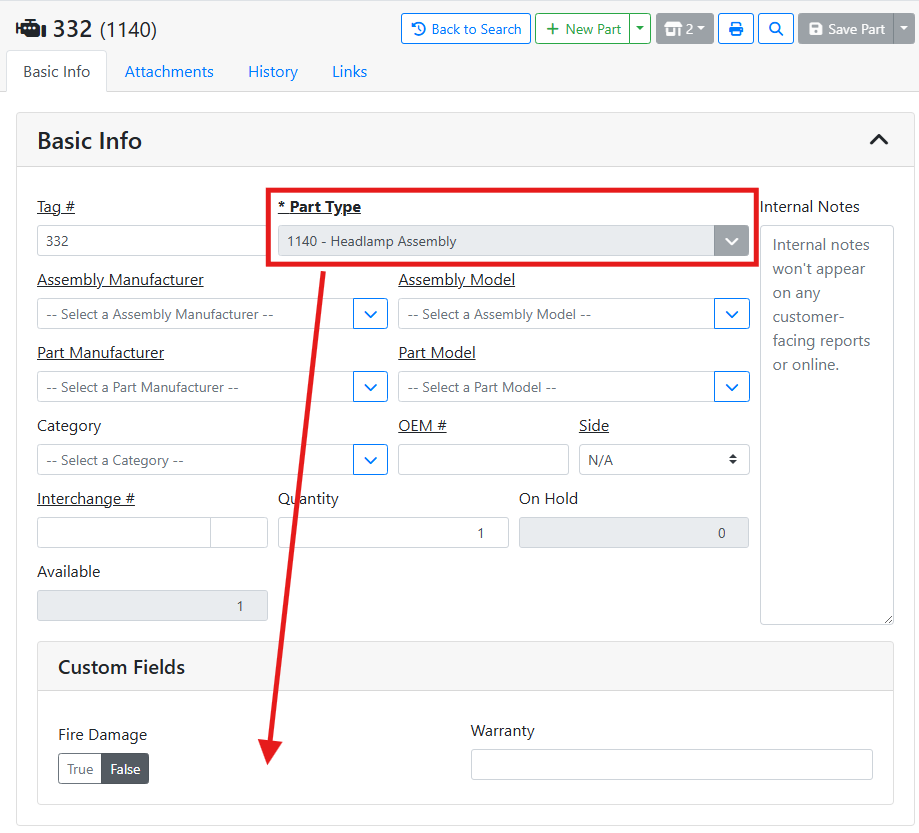
Since this field is specific to engines, I don’t see the mileage field on other parts like a headlamp assembly.
ℹ️ Custom Field Details
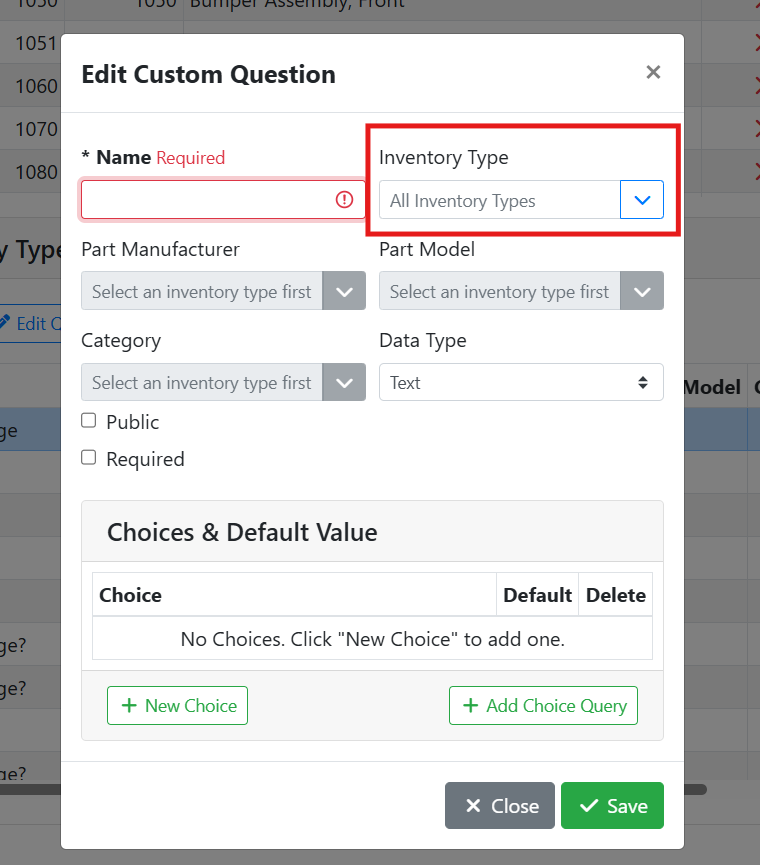
When editing a custom field or making a new one, a window will open where you can set the details of the custom field and how it should behave.
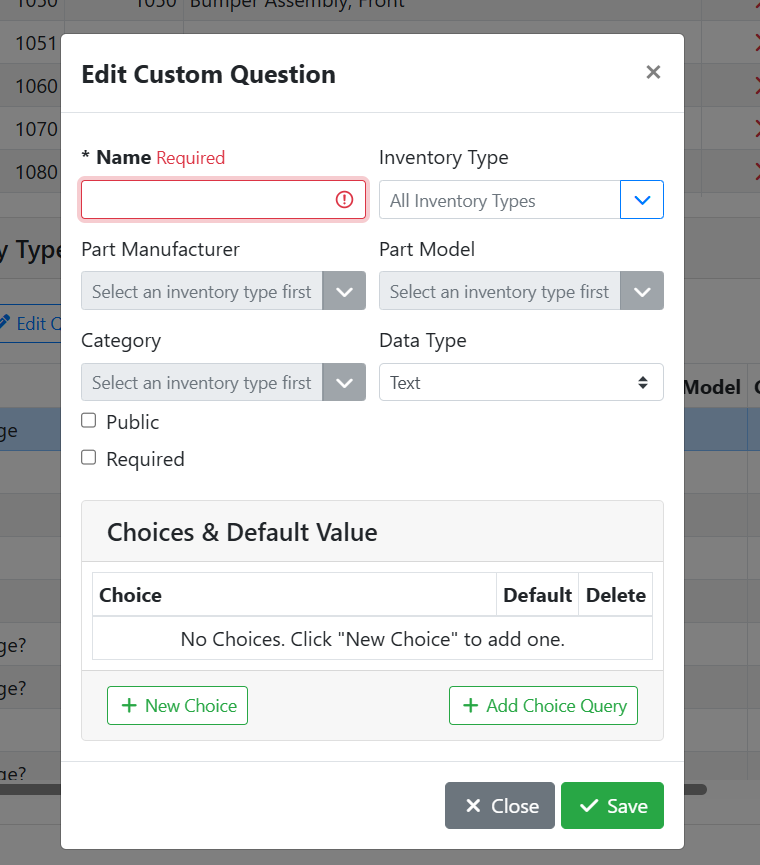
Name - The name of the custom field is used as a label for the field on the part.
Inventory Type - The part type that will use this custom field, if any. Leave this blank to make a global field that will appear on all part types.
Part Manufacturer - The part manufacturer that will use this custom field, if any. Leave this field empty to make a custom field that applies to all part manufacturers.
Part Model - The part model that will use this custom field, if any. Leave this field empty to make a custom field that applies to all part models.
Category - The part category that will use this custom field, if any. Leave this field empty to make a custom field that applies to all categories.
Data Type - The Data Type specifies how data should be entered into this field. Setting the right data type makes it easier to make sure your users are entering the data correctly.
Possible data types:
Text - Allows anything to be typed into the field.
Autosuggest Text - Allows a user to type in a field and have it suggest matching text based on a built set of choices. See How to Use Choices below.
Choice - Shows a menu where a user can make a selection from a list of choices. See How to Use Choices below.
Number - Only numbers can be entered into this field.
Currency - Only currency amounts can be entered into this field.
Date - Shows a date picker for a user to select a date.
Time - Only a time can be entered into this field.
Datetime - Shows a date and time picker for a user to select a date and a time.
Boolean - Shows a True/False option that the user can select from.
Public - Indicates if this data should be displayed online with the part if the part is marked public. For example, if this is a field you want your customers to see, such as an engine’s mileage, check this box. If this is a field you use internally, such as a vendor catalog number, leave this unchecked.
Required - Check this box if you want this field to be required to be filled out before your users can save the part. This is a good way to enforce good data entry, if the field should always be captured.
Choices & Default Value - For Choice and Autosuggest Text data types, use this table to specify the values and default behavior in your choices. See How to Use Choices below.
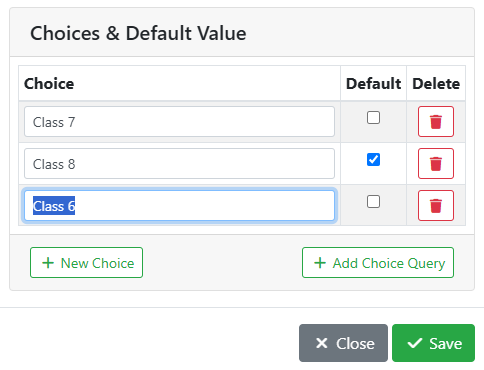
❓ How to Use Choices
For Choice and Autosuggest Text data types, you need to specify what users are going to see in the field to pick from.
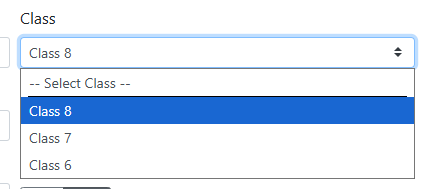
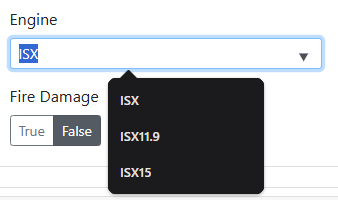
Choice - The name of the choice the user will see in the menu.
Default - Check this box to have this choice selected by default.
Delete - Click to remove the choice.
New Choice - Click to add a choice.
Add Choice Query - Optional, Advanced - For power users, a MySQL query that returns dynamic values to be shown in a drop down or specify a default.
For more information about Choice Queries, please contact ISoft support.
➕ Adding a Choice
To add choices, click the New Choice button in the Edit Custom Question window.
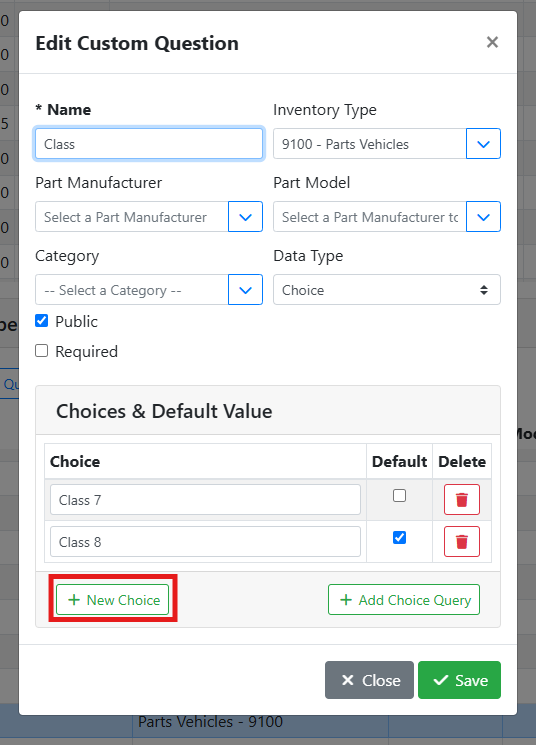
An empty row will appear, type your new choice name into the field. Continue adding choices until you are finished. Click Save when you are done.