User Groups in ITrack make it much easier to control permissions for your users when they share similar roles.
Without using user groups, you can still manage permissions for your users, it will just need to be done individually instead.
Read more about User Permissions.
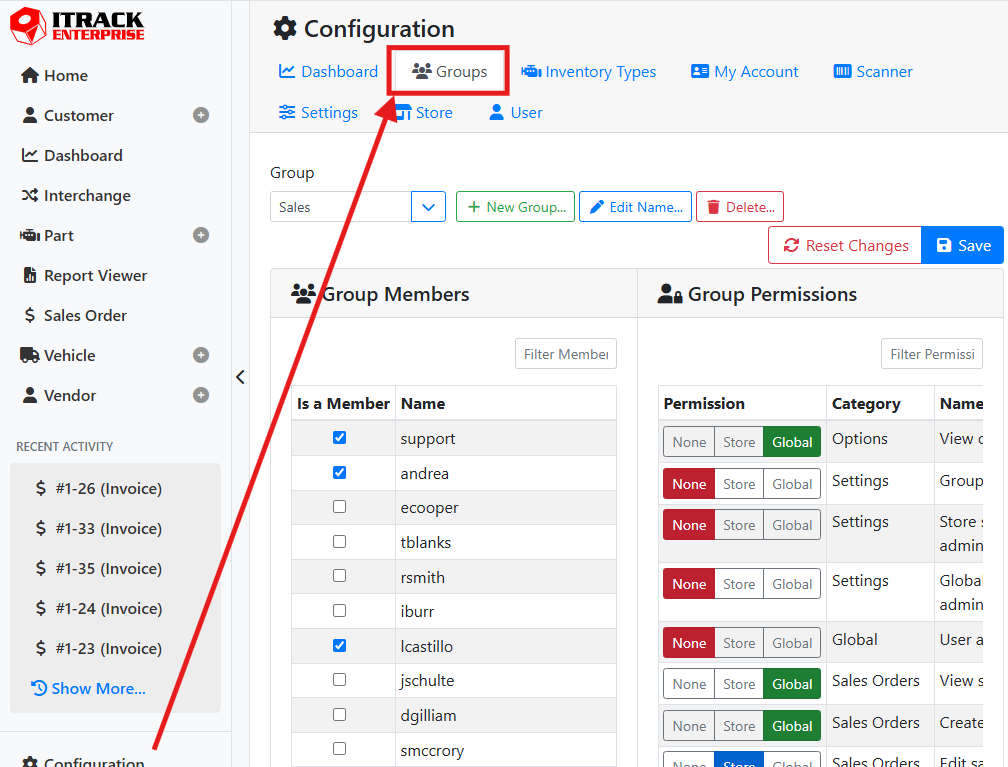
To manage user groups, navigate to Configuration > Groups.
👥 How to Use User Groups
User Groups can be used a lot of different ways to make things efficient, such as setting them up based on job or title, or setting them up based on tasks. However, each yard’s internal operations and procedures are going to influence the best way to use user groups, so you are going to need to consider what works best for you.
For an example of job-based groups, if I have 7 employees working in the service and repair shop, they likely all have the same responsibilities. In this case, it might make sense to create one user group for all the service repair techs, and assign all of them to that same Service group.
If I need to change their permissions, I only need to make the change to the Service group, and every member of the group will be granted that permission with only a single change.
For an example of task-based groups, if I have several employees who work at the front desk, they might have other responsibilities and might not fit in the same group of permissions. In this case, it might make sense to create a user group for each job responsibility, and then add each person to the correct set of responsibilities.
Then, if someone gets some additional responsibilities, I only need to add them to that user group, without affecting anyone else.
Did you know? If a user is a member of a group but needs a one-off permission granted to them, you can add this permission on the user without changing the user group settings. Permissions are additive, so all you need to do is override that single permission. However, if you need to remove a permission, you will need to make sure the user doesn’t have that permission assigned to them or any groups they are a member of.
➕ Creating and Editing User Groups
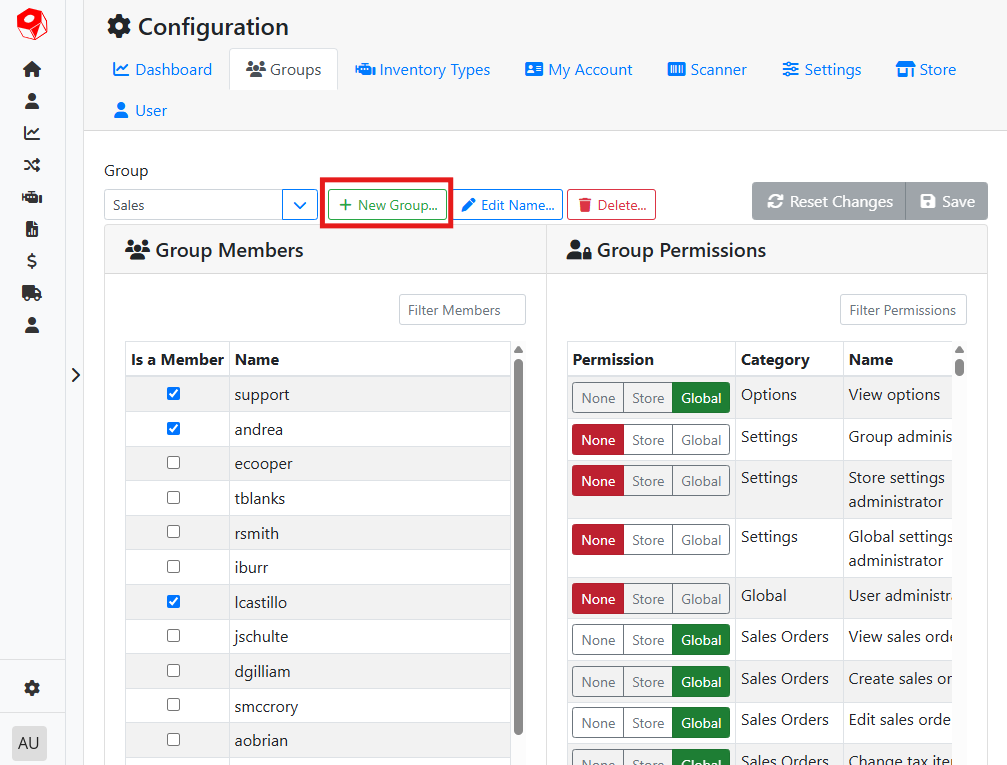
To create a user group, click the New Group button next to the Group selection menu.
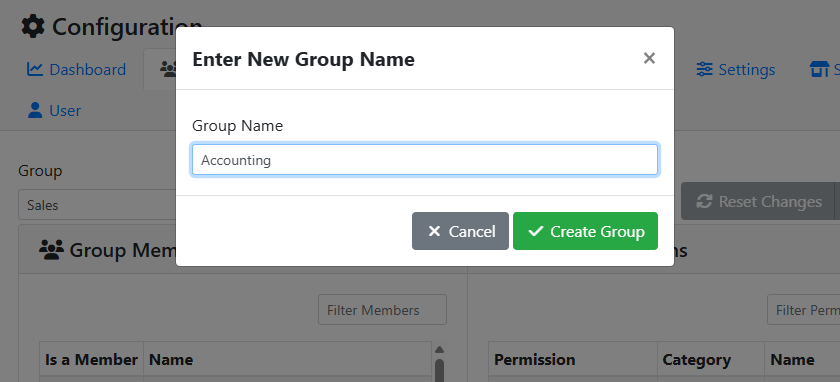
A window will open where you can specify the name of the group.
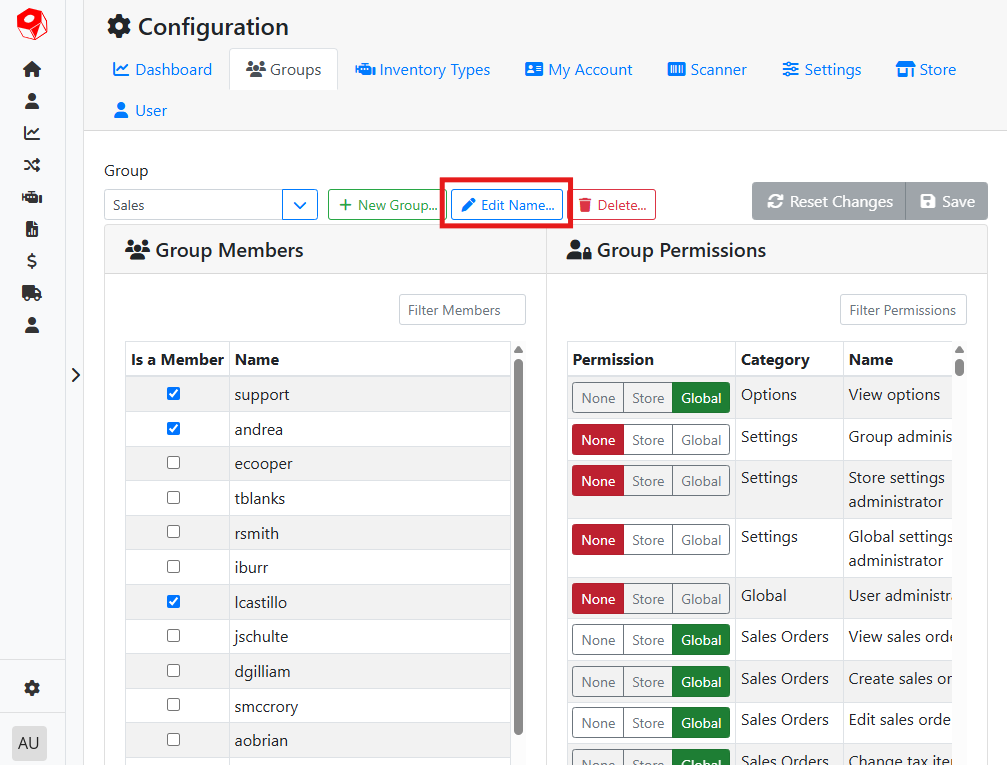
Click the Edit Name button to edit the name of the group.
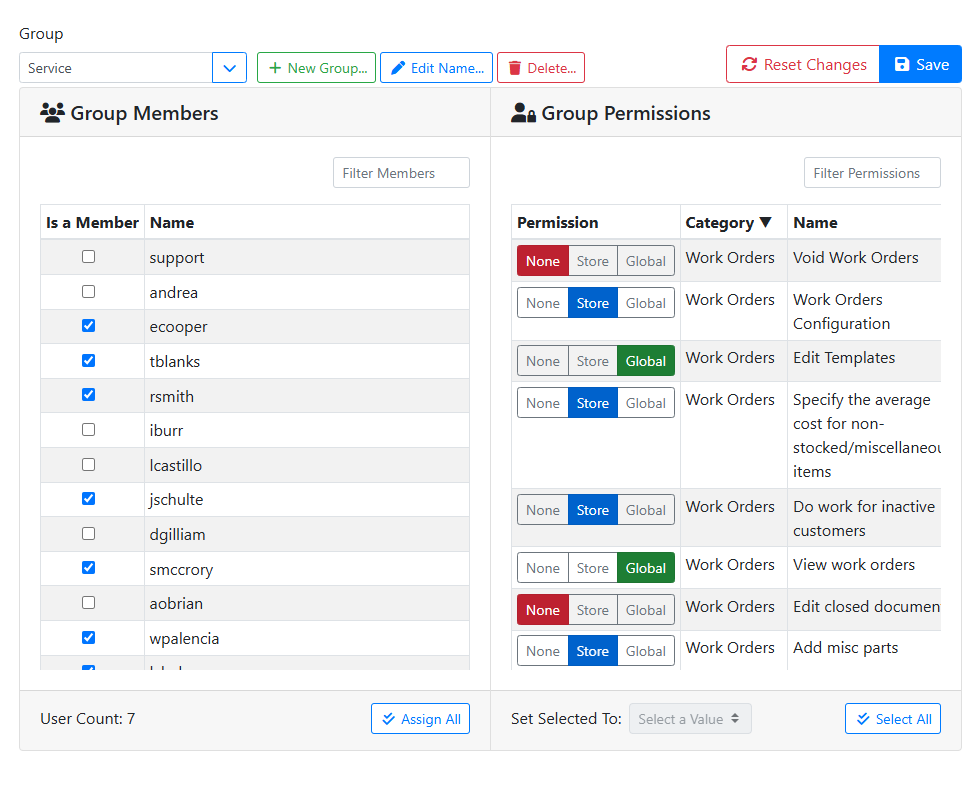
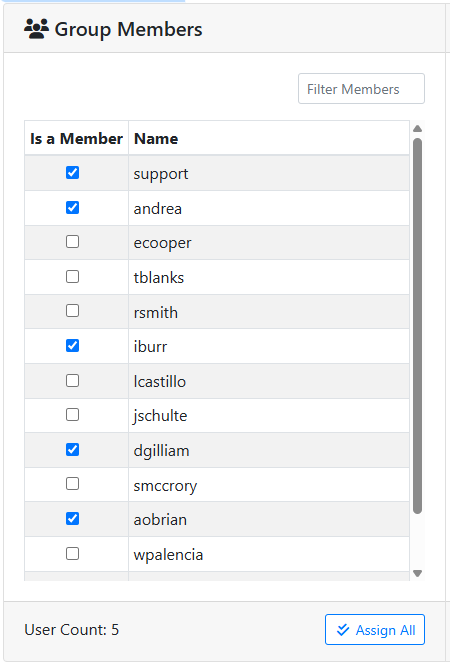
The Group Members table shows you all the members of the group. Check the box next to each user you want to inherit the group permissions. If you have a lot of users, the Filter Members control will help you narrow the list. At the bottom of the table you can see how many users are members of the group, and the Assign All button lets you add everyone to the group quickly.
The Group Permissions table shows you what permissions will be granted to the user from their group membership. There is a large list of permissions, so it is recommended to use the Filter Permissions control to quickly find what you’re looking for.
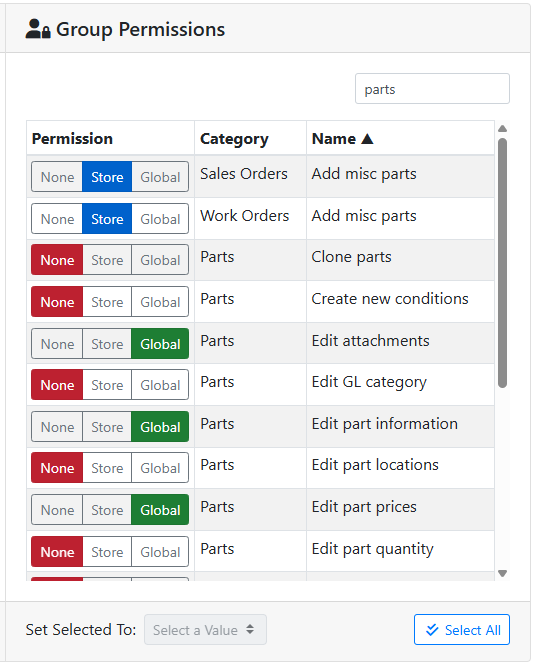
The controls at the bottom of the table make it easier to set multiple permissions to the same value at once. Use the Select All button, or click on rows in the table to select more than one permission, then use the Set Selected To menu to assign a permission value to all selected permissions.

Permission values can either be None, Store or Global.
None - This group doesn’t grant this permission.
Note that this doesn’t guarantee that users in this group don’t have this permission. Membership in another group or an override on the user might grant this permission regardless.
Store - This group grants this permission, but only at the store(s) the user has access to.
Global - This group grants this permission across all stores.
👥 Assigning a User to a Group
Users can be assigned to a group either in the Group configuration screen or in the User configuration screen.
Users can be members of more than one group. Permissions are always additive. This means that if a user is a member of two groups, but one group disallows an action and the other allows it, the user will be allowed to do the action.
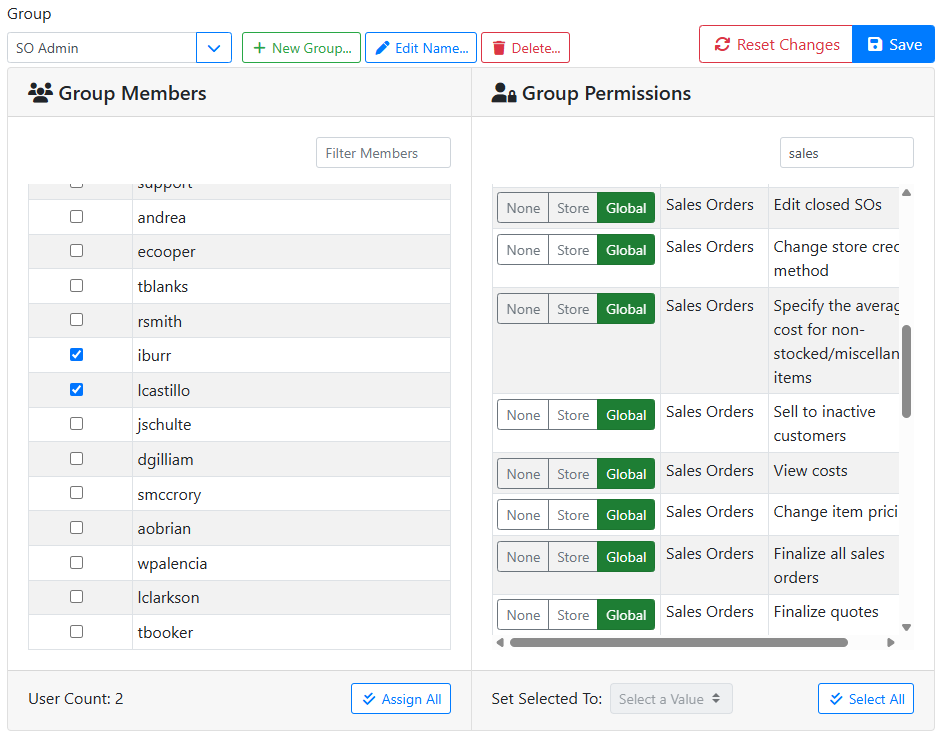
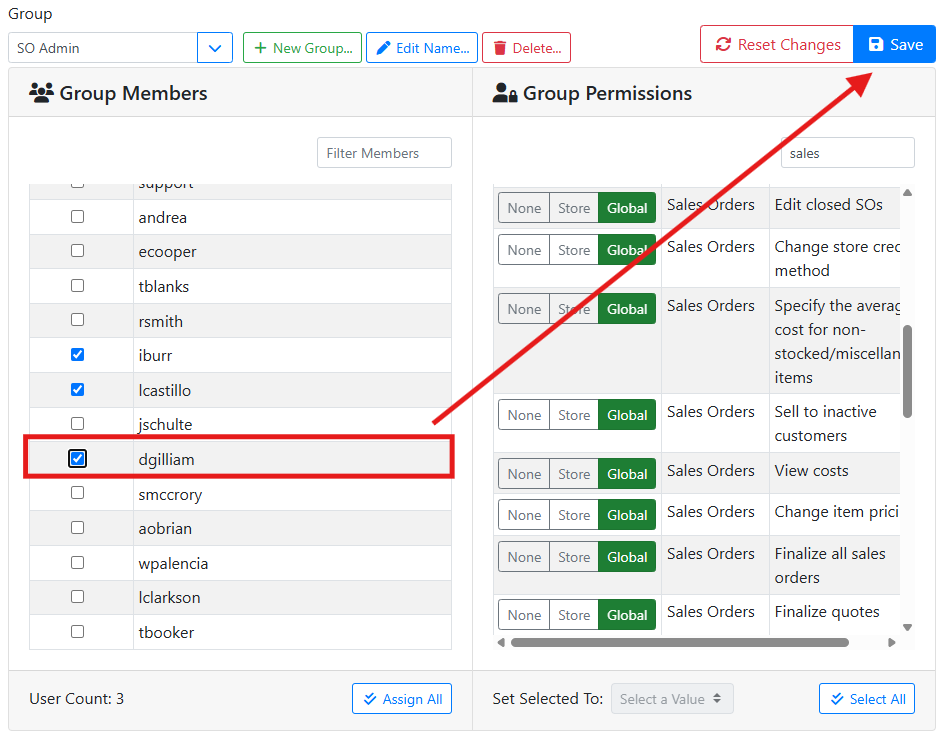
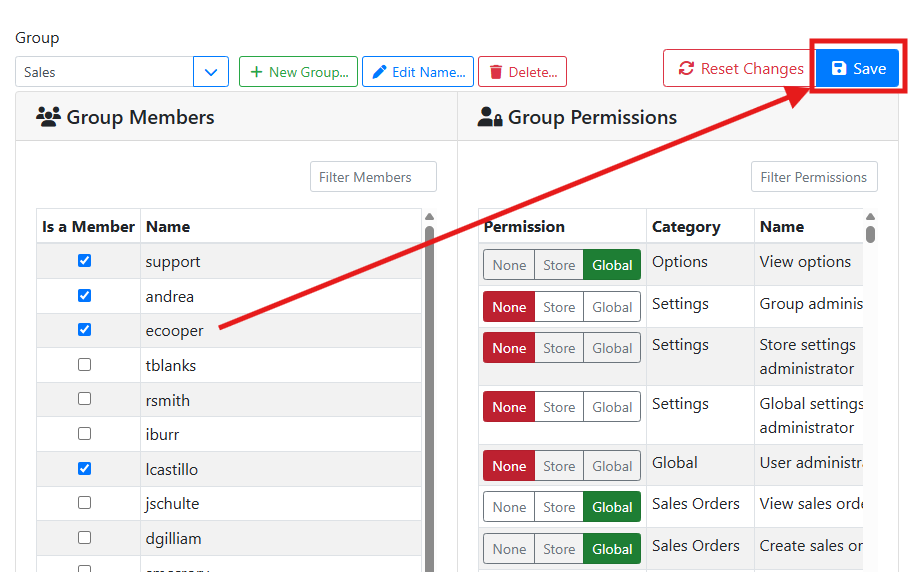
On the Group configuration screen, select the group from the Group selection menu. In the Group Members table, check the box next to each user you want to be a member of this group. Use the Assign All or Unassign All button near the bottom to quickly toggle all users. Use the Filter Members element to help find a specific user.
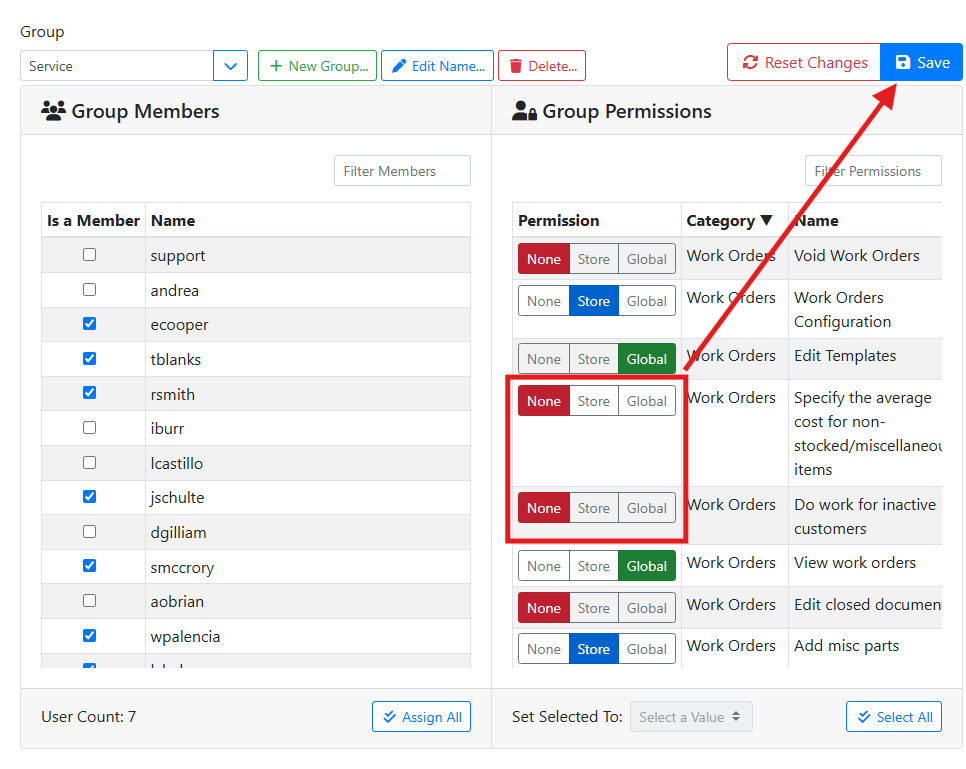
When you are finished, make sure to save your changes by clicking the Save button in the upper right corner.
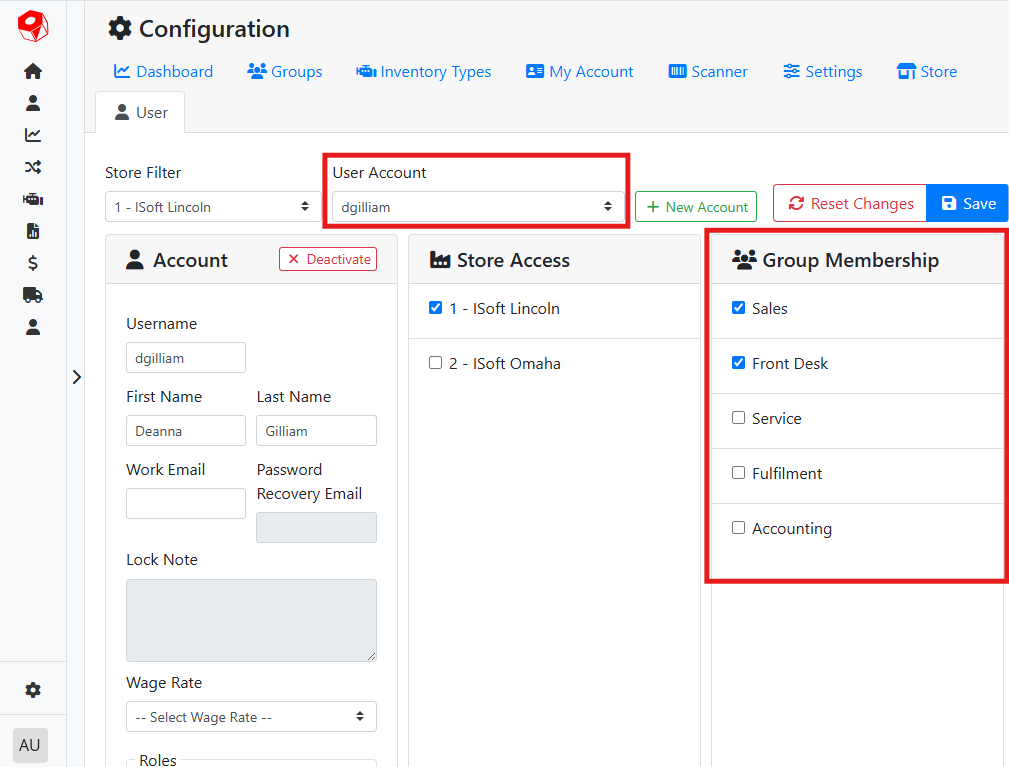
To assign a user to a group on the User configuration screen, select the user from the User Account selection menu. In the Group Membership table, check the box next to each group you want this user to be a member of. When you are finished, make sure to save your changes by clicking the Save button in the upper right corner.
Read more about User configuration.